Change Data Capture from Azure SQL to Apache Kafka® with Debezium
Implement a real-time change data capture workflow from an Azure SQL database using Aiven for Apache Kafka® and Debezium
Implement a real-time change data capture workflow from an Azure SQL database using Aiven for Apache Kafka® and Debezium
Azure SQL offers a SQL Server backend for applications on Microsoft Azure. This tutorial will showcase how to build a real-time change data capture process to track the changes happening in one (or more) Azure SQL tables and stream them into Apache Kafka®, where multiple consumers can receive the data with a minimal latency.
We'll use a single table containing book titles to demonstrate all the steps needed to setup the flow.
The first step in the journey is to create a SQL Server database in Azure SQL. To do this:
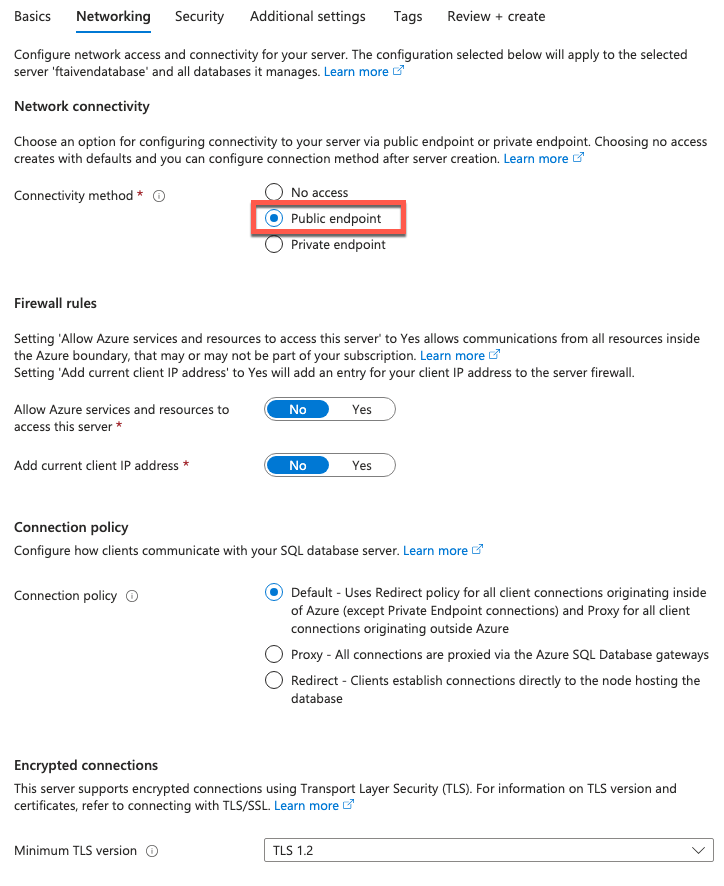
In the Networking tab, select the Public endpoint as the Connectivity method
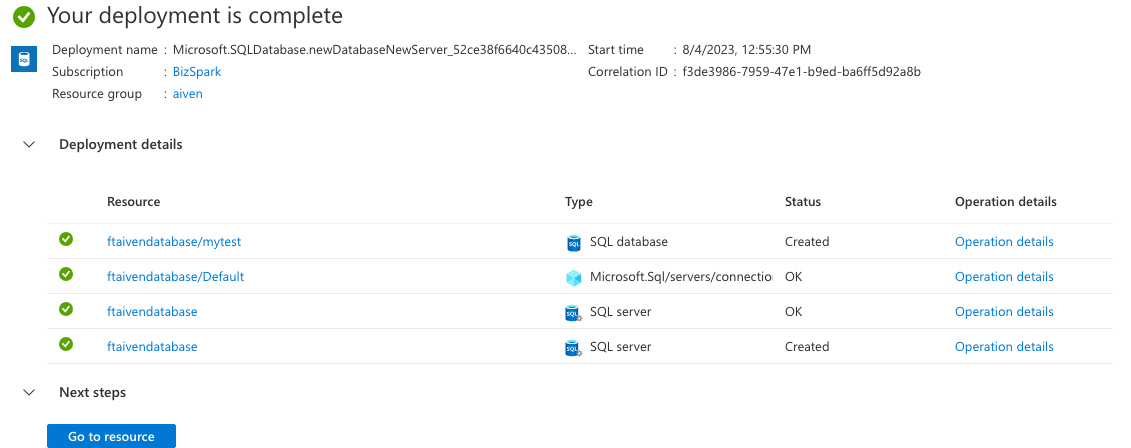
Click on Create to create the database
To connect Apache Kafka the Azure SQL database you just created, you need to allow traffic from a virtual network from specific IPs by adding Firewall rules. To do this:
Once the Azure SQL database is up and running, it's time to insert some data. To do this, we need to:
We're going to use mssql-cli to connect to the database. If you don't have it already can review the installation instructions.
We can connect to the Azure SQL database with the following command in the terminal:
Loading code...
Where:
<DATABASE_HOST> is the Azure SQL database host from the Azure console<DATABASE_PORT> is the Azure SQL database port from the Azure console<DATABASE_NAME> is the name of the database<DATABASE_USERNAME> is the username created during the SQL authentication phase of the configurationOnce connected, we can enable change data capture at database level. The below command starts the creation of a set of new tables that logs all the changes in one or more target tables. We can enable CDC at database level with:
Loading code...
Where mytest is the name of the database.
Next, we can create a table that we'll track later:
Loading code...
Once the MY_BOOK table is created, enable change data capture on it with:
Loading code...
We can verify that the MY_BOOK table is being tracked by querying the system tables with:
Loading code...
The above query should show the MY_BOOK table with the is_tracked_by_cdc set to 1, similar to the following:
Loading code...
Once the tracking is started, we are ready to insert some rows related to interesting books:
Loading code...
A query like SELECT * FROM MY_BOOK shows the three rows been stored in the table:
Loading code...
The target of our change data capture pipeline will be an Apache Kafka topic. If you don't have an Apache Kafka cluster available, you can use Aiven for Apache Kafka®:
kafka.auto_create_topics_enable from the Advanced configuration section to automatically create topics based on the Kafka Connect configurationsOnce Apache Kafka is running, the next step is to setup the CDC pipeline. To do so we can head to the Connectors tab, select the Debezium for SQL Server connector and include the following configuration:
Loading code...
Where:
database.hostname, database.port, database.password are the Azure SQL connection parameters found in the Azure consoledatabase.server.name is the prefix for the topic names in Apache Kafkadatabase.history.kafka.bootstrap.servers is the Apache Kafka hostname and port. If you're using Aiven, these are in the Aiven Console, under Service > Overview.database.history.kafka.topic is the topic that receives the definition of changes of data structures. This is useful when replicate the structures and data changes to a target SQL server database.table.include.list lists the tables for which we want to enable CDC. In our case it's dbo.MY_BOOK.database.history.producer parameters can be left unchanged since are pointing to internal truststores and keystores created in Aiven for Apache Kafka. If you're using a different Apache Kafka service, you might need to alter these.Note: You need to open the connectivity between the Azure SQL database and Apache Kafka. To do so, create a virtual network or by add Apache Kafka's IPs in the Firewall rules. You can find the Kafka IPs with the following command using the Aiven CLI:
Loading code...
Apache Kafka IP addresses can change over time due to node replacement during maintenance windows or upgrades. If you're using Aiven and need fixed IP address for a service, read how to define and manage static IP addresses.
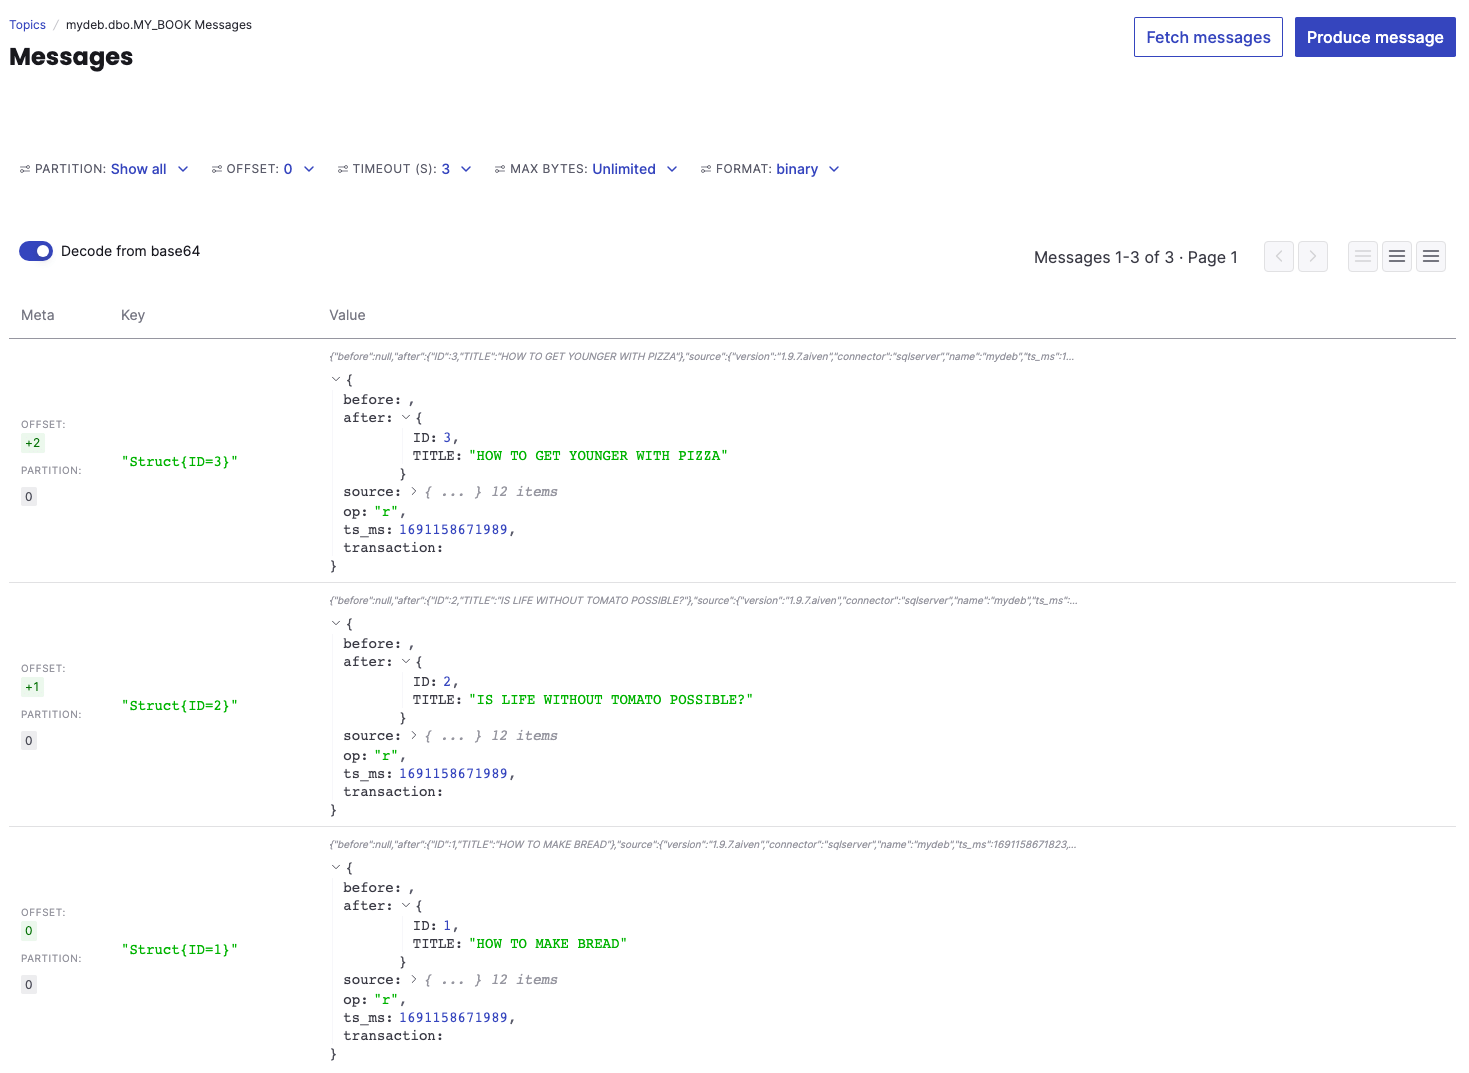
Once the connector is up and running, we should see a topic named mydeb.dbo.MY_BOOK, the concatenation of the database.server.name parameter and the RDS schema and table name. To do this, navigate to the Aiven console and:
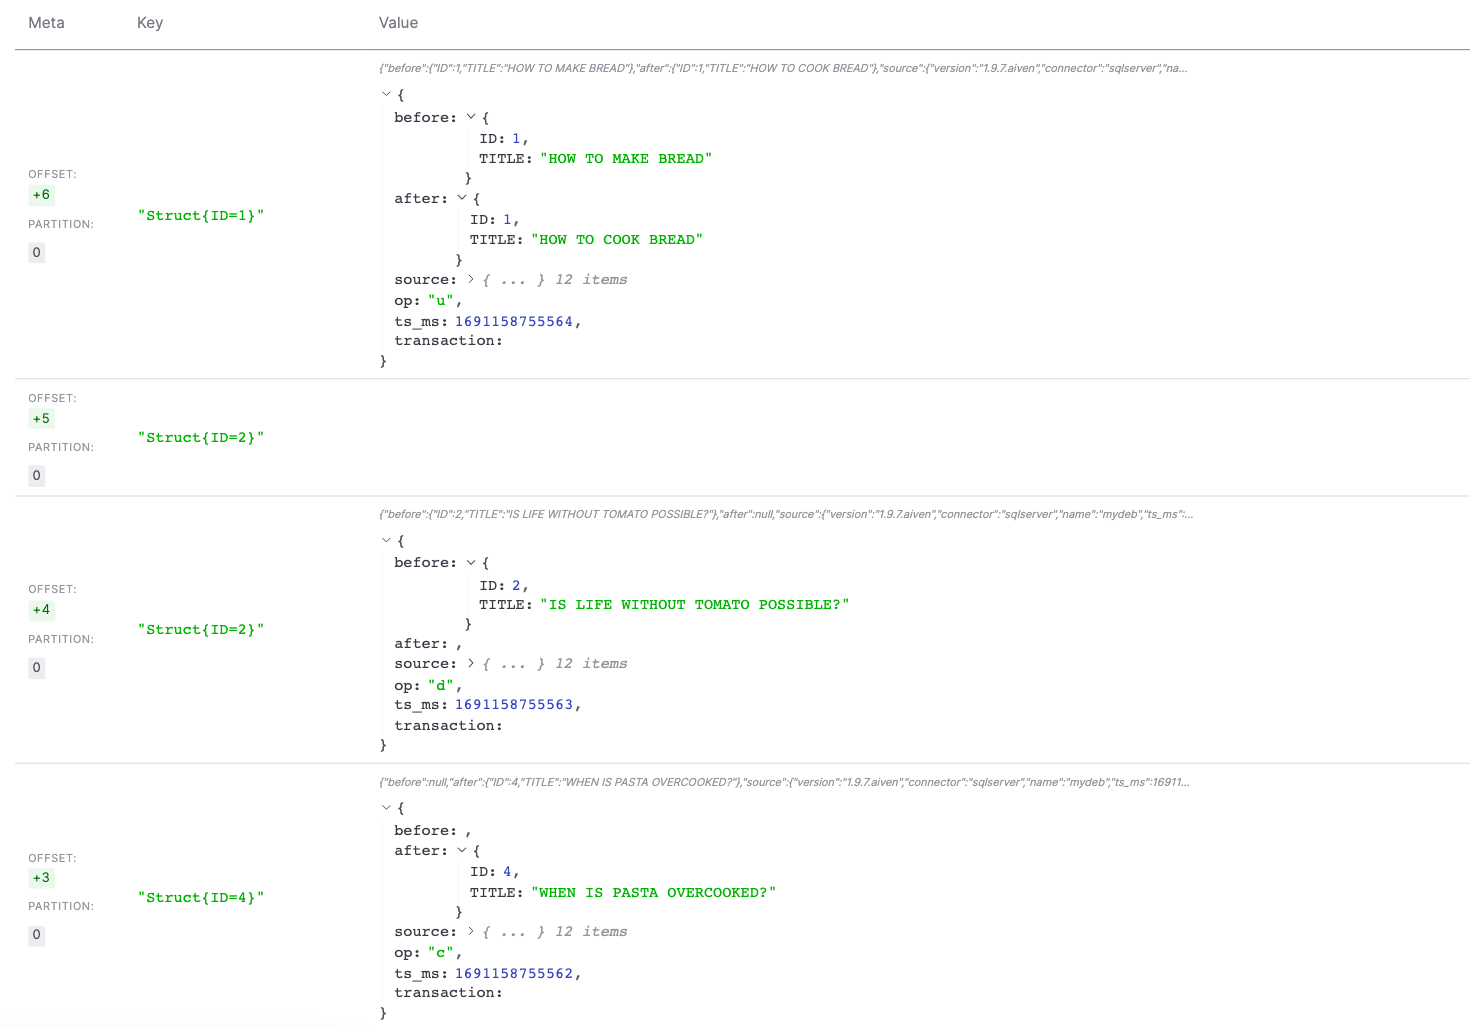
mydeb.dbo.MY_BOOK topicYou should see the same dataset we previously pushed to RDS appearing in JSON format in the topic:
Now, if you perform an INSERT, DELETE, and UPDATE in RDS using psql in the command line, such as the following:
Loading code...
The above changes should immediately be visible in the Aiven for Apache Kafka by clicking on the Fetch Messages button.
Setting up a change data capture process from an Azure SQL database to Apache Kafka with the Debezium connector is a powerful way to stream inserts/updates/deletes to one or more consumers in real time. The Debezium CDC process with SQL server relies on change tables being created in the database, so some the source database needs some modifications to enable this functionality.
mssql-cli -S "<DATABASE_HOST>,<DATABASE_PORT>" -d <DATABASE_NAME> -U <DATABASE_USERNAME>USE mytest
GO
EXEC sys.sp_cdc_enable_db
GOCREATE TABLE MY_BOOK(ID INT IDENTITY(1, 1) PRIMARY KEY, TITLE VARCHAR(300));EXEC sys.sp_cdc_enable_table
@source_schema=N'dbo',
@source_name=N'MY_BOOK',
@role_name = NULL,
@supports_net_changes=1
GOSELECT
s.name AS Schema_Name,
tb.name AS Table_Name,
tb.object_id,
tb.type,
tb.type_desc,
tb.is_tracked_by_cdc
FROM sys.tables tb
INNER JOIN sys.schemas s on s.schema_id = tb.schema_id
WHERE tb.is_tracked_by_cdc = 1+---------------+--------------+-------------+--------+-------------+---------------------+
| Schema_Name | Table_Name | object_id | type | type_desc | is_tracked_by_cdc |
|---------------+--------------+-------------+--------+-------------+---------------------|
| dbo | MY_BOOK | 2099048 | U | USER_TABLE | 1 |
+---------------+--------------+-------------+--------+-------------+---------------------+INSERT INTO MY_BOOK(TITLE) VALUES
('HOW TO MAKE BREAD'),
('IS LIFE WITHOUT TOMATO POSSIBLE?'),
('HOW TO GET YOUNGER WITH PIZZA');+------+----------------------------------+
| ID | TITLE |
|------+----------------------------------|
| 1 | HOW TO MAKE BREAD |
| 2 | IS LIFE WITHOUT TOMATO POSSIBLE? |
| 3 | HOW TO GET YOUNGER WITH PIZZA |
+------+----------------------------------+
(3 rows affected){
"name": "mysourcedebezium",
"connector.class": "io.debezium.connector.sqlserver.SqlServerConnector",
"database.server.name": "mydeb",
"database.dbname": "<DATABASE_NAME>",
"database.hostname": "<DATABASE_HOST>",
"database.port": "<DATABASE_PORT>",
"database.user": "<DATABASE_USER>",
"database.password": "<DATABASE_PASSWORD>",
"table.include.list": "dbo.MY_BOOK",
"database.history.kafka.bootstrap.servers": "<KAFKA_HOST>:<KAFKA_PORT>",
"database.history.kafka.topic": "history",
"database.history.consumer.security.protocol": "SSL",
"database.history.consumer.ssl.key.password": "password",
"database.history.consumer.ssl.keystore.location": "/run/aiven/keys/public.keystore.p12",
"database.history.consumer.ssl.keystore.password": "password",
"database.history.consumer.ssl.keystore.type": "PKCS12",
"database.history.consumer.ssl.truststore.location": "/run/aiven/keys/public.truststore.jks",
"database.history.consumer.ssl.truststore.password": "password",
"database.history.producer.security.protocol": "SSL",
"database.history.producer.ssl.key.password": "password",
"database.history.producer.ssl.keystore.location": "/run/aiven/keys/public.keystore.p12",
"database.history.producer.ssl.keystore.password": "password",
"database.history.producer.ssl.keystore.type": "PKCS12",
"database.history.producer.ssl.truststore.location": "/run/aiven/keys/public.truststore.jks",
"database.history.producer.ssl.truststore.password": "password"
}avn service get <APACHE_KAFKA_SERVICE_NAME> --json | jq '.connection_info.kafka'INSERT INTO MY_BOOK (TITLE) VALUES ('WHEN IS PASTA OVERCOOKED?');
DELETE FROM MY_BOOK WHERE TITLE='IS LIFE WITHOUT TOMATO POSSIBLE?';
UPDATE MY_BOOK SET TITLE='HOW TO COOK BREAD' WHERE TITLE='HOW TO MAKE BREAD';