Migrate from Redis®* to Aiven for Valkey™ using Aiven Console
Migrate your Redis®* databases, whether on-premise or cloud-hosted, to Aiven for Valkey™, using Aiven Console's guided wizard.
- Migrating from Google Cloud Memorystore for Redis is not supported.
- Source Redis version must be equal to or lower than:
- Redis version 7.2
- Target Aiven for Valkey version
Prerequisites
Before starting the migration process, ensure you have the following:
- A target Aiven for Valkey service. To create one, see Get started with Aiven for Valkey.
- Source database information:
- Hostname or connection string: This is the public hostname, connection string, or IP address used to connect to the database. Refer to accessible from the public Internet.
- Port: The port used to connect to the database.
- Username: The username used to connect to the database. Ensure this user has sufficient permissions to access the data to migrate.
- Password: The password used to connect to the database.
- To enable traffic and connection between the source and target databases, ensure that you update or disable the firewalls that protect them. If necessary, you can temporarily disable the firewalls.
- A source Redis®* service that is secured with SSL is a default migration requirement.
- A publicly accessible source Redis®* service or a service with a VPC peering connection between private networks. The VPC ID and cloud name are required for the migration process.
AWS ElastiCache for Redis®* instances cannot have public IP addresses and require project VPC and peering connection.
Migrate a Redis database
To migrate a Redis database to Aiven for Valkey service:
- Log in to the Aiven Console, and select the target Aiven for Valkey service for migrating the Redis® database.
- Click Service settings on the sidebar.
- Scroll to the Service management section, and click Actions > Import database. to initiate the import process.
- Follow the wizard to guide you through the database migration process.
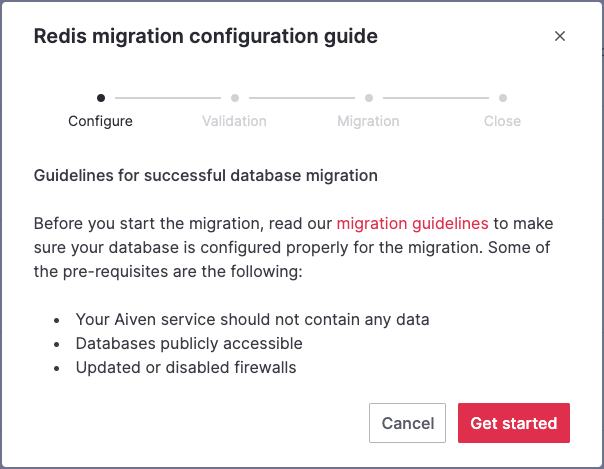
Step 1: Configure
Read through the guidelines on the Redis migration wizard and click Get started to proceed with the database migration.
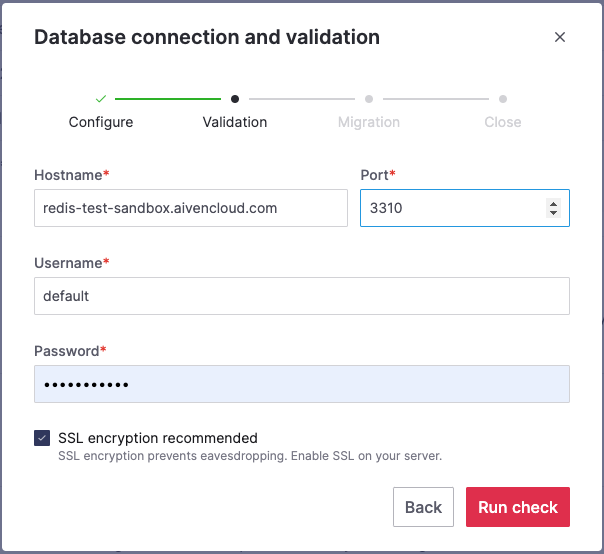
Step 2: Validation
-
On the Database connection and validation screen, enter the following information to establish a connection to your source database:
- Hostname: This is the public hostname, connection string, or IP address used to connect to the database.
- Port: The port used to connect to the database.
- Username: The username used to connect to the database.
- Password: The password used to connect to the database.
-
Select the SSL encryption recommended checkbox.
-
Click the Run check to validate the connection. If the check returns any warning, resolve the issues before proceeding with the migration process.
Step 3: Migration
On the Database migration screen, click Start Migration to begin the migration.
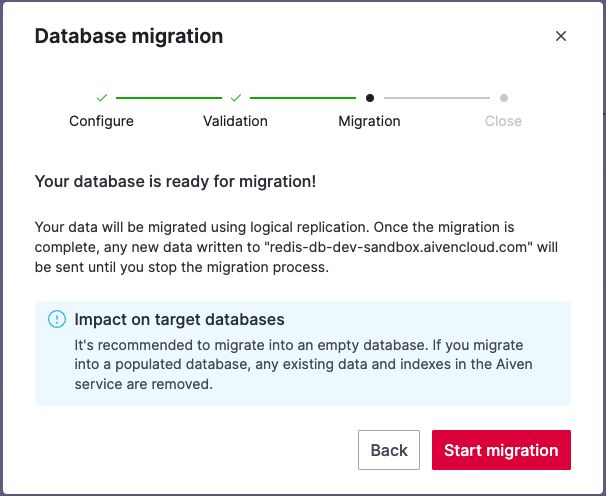
While the migration is connected and running, changes in the source are continuously replicated to Aiven for Valkey. If a key is created, modified, or deleted in the source, the same change is reflected on the Aiven service.
While the migration is in progress, you can
- Close the wizard by clicking Close window. To check the migration status anytime,return to the wizard from the service's overview page.
- Continue writing to the target database.
- Stop the migration by clicking Stop migration. Data that has already been migrated is retained, and you can initiate a new migration at any time
If you choose to stop the migration, this action immediately halts the replication of your data. However, any data that has already been migrated to Aiven is retained. You can initiate a new migration later, and this process overwrites any previously migrated databases.
If so, investigate possible causes of the failure and address the identified issues. Once you have resolved the underlying problems, initiate the migration by clicking Start over.
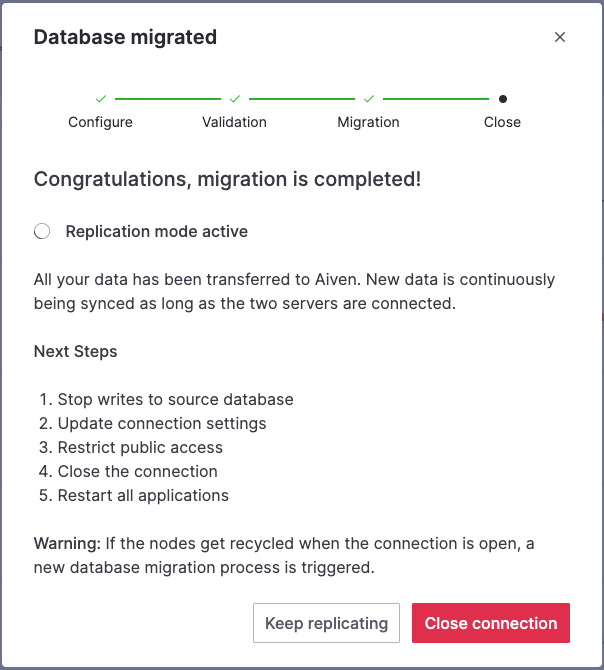
Step 4: Close
When the wizard informs you about the completion of the migration, you can choose one of the following options:
-
Click Close connection to disconnect the databases and stop the replication process if it is still active.
-
Click Keep replicating to keep the connection open and the replication mode active for continuous synchronization of any subsequent additions to the connected databases.
-
Iinitial sync completion: The Valkey replica exposes
master_sync_in_progress. When it is0, the initial sync (RDB load) is complete and the migration is considered done. -
Cutover when replication continues: If the source is still receiving writes, perform the final sync verification to ensure all data is replicated:
- Stop writes to the source.
- Run
INFO REPLICATIONon both the source and the Aiven replica. - Compare the values of
master_repl_offseton the source and theslave_repl_offseton the replica.
If
slave_repl_offset≥master_repl_offset, you can safely close the connection.
Related pages