Stream Mastodon data to Apache Kafka® using NodeJS and TypeScript
If you want to analyze Mastodon posts, getting them into Apache Kafka® is a sensible first step. Read on to find out how to do this with Typescript and NodeJS.
If you want to analyze Mastodon posts, getting them into Apache Kafka® is a sensible first step. Read on to find out how to do this with Typescript and NodeJS.
Mastodon has been rising in popularity over recent months. If you're not yet familiar with this exotic online creature, Mastodon is an open-source social networking software for microblogging. Instead of being a single network, like Twitter, Mastodon is a federated platform that connects independent interconnected servers. This makes it a fully decentralised system. It relies on ActivityPub and uses the ActivityStreams 2.0 data format and JSON-LD. As for the functionality, it resembles closely Twitter - you can read the timeline, post messages and interact with other users.
If you just recently joined Mastodon and are still exploring it, you might find that the scrolling timeline has its limits to understand all that is happening there. Applying some engineering skills will give a better overview on the topics and discussions happening on the platform.
Since Mastodon's timeline is nothing more than a collection of continuously coming events, the data feed is well-suited for Apache Kafka®. Adding Kafka connectors on top of that opens multiple possibilities to use data for aggregations and visualisations.
Continue reading to learn how to bring data from Mastodon to Kafka using TypeScript and a couple of helpful libraries.
To bring the data from the Mastodon timeline to a topic in Apache Kafka, you'll need an Apache Kafka cluster and some code to stream the data there. For the former, you can use either your own cluster, or a managed version that runs in the cloud, such as Aiven for Apache Kafka. If you don't have an Aiven account yet, sign up for a free trial and create your cluster, the setup only takes a few minutes.
Once your cluster is running,add a topic with the name mastodon. Alternatively, you can use any other name, just remember it, you'll need it a bit later.
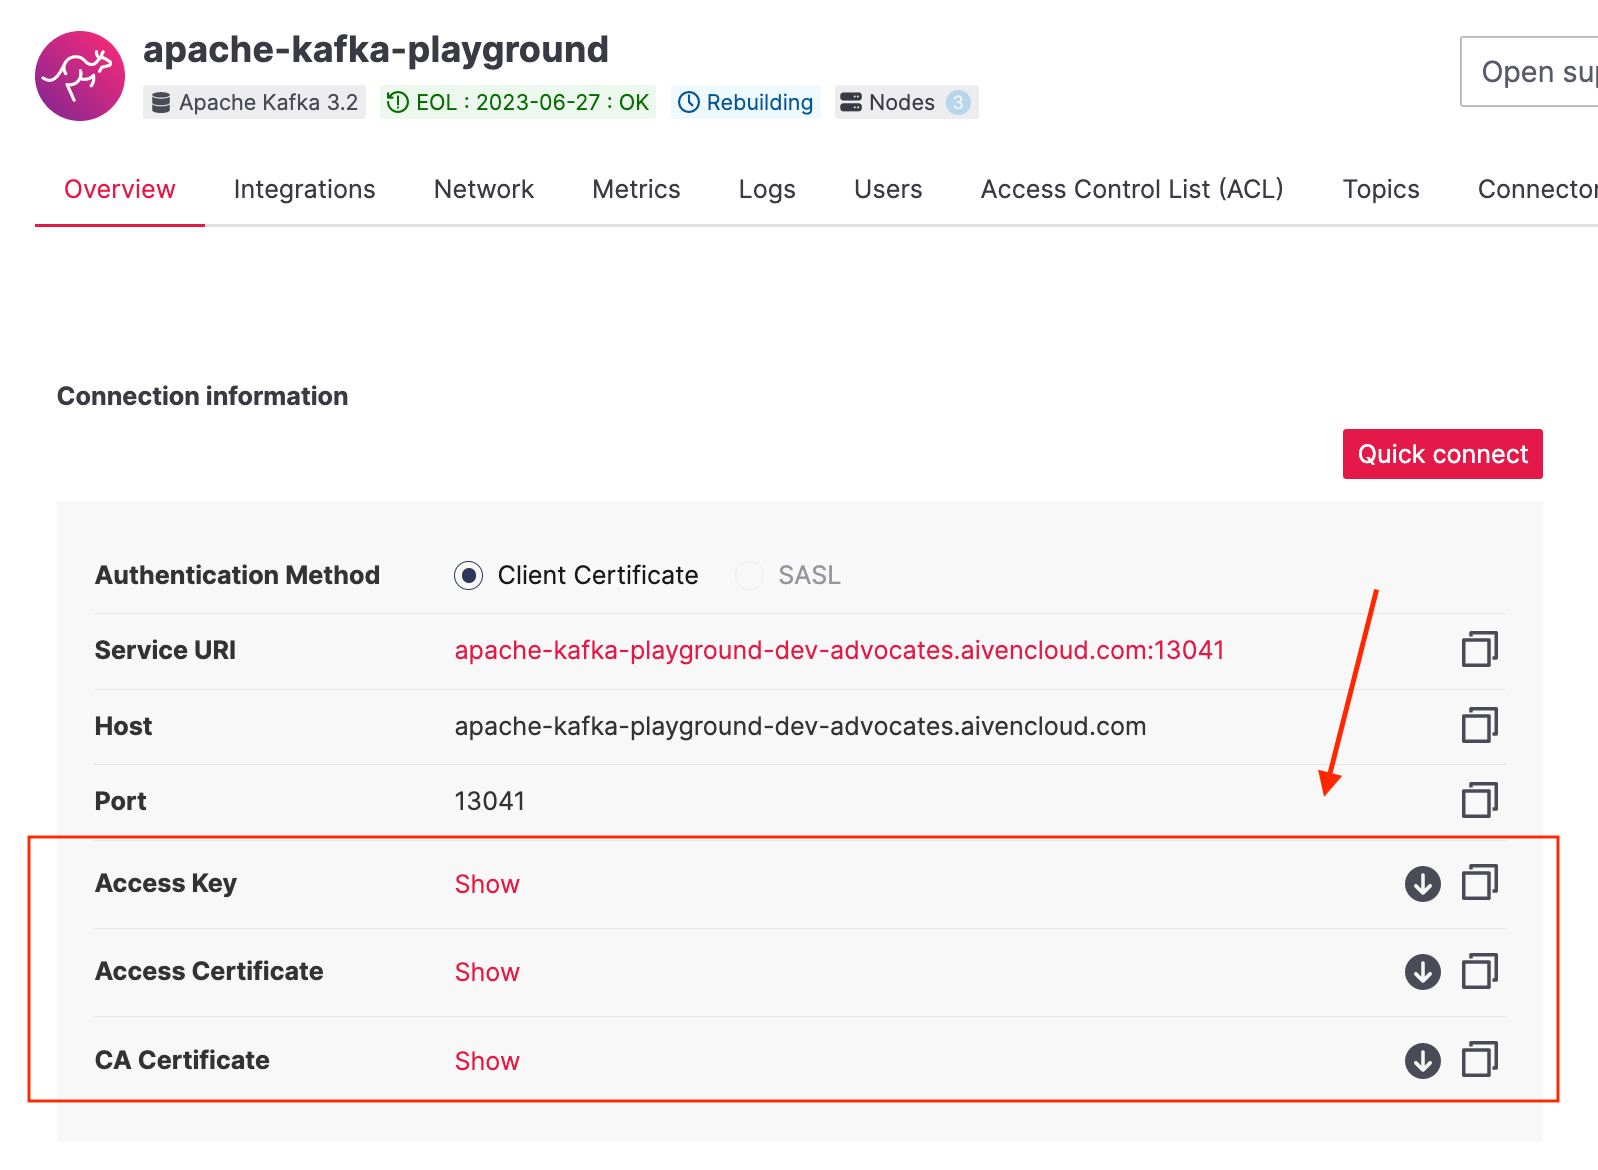
To connect securely to the cluster we'll use SSL. Aiven already takes care of the configuration of the server, but you'll need to download three files for the client to establish the connection. Download these files from Aiven's console:
You will need these files later, so put them somewhere safe for now.
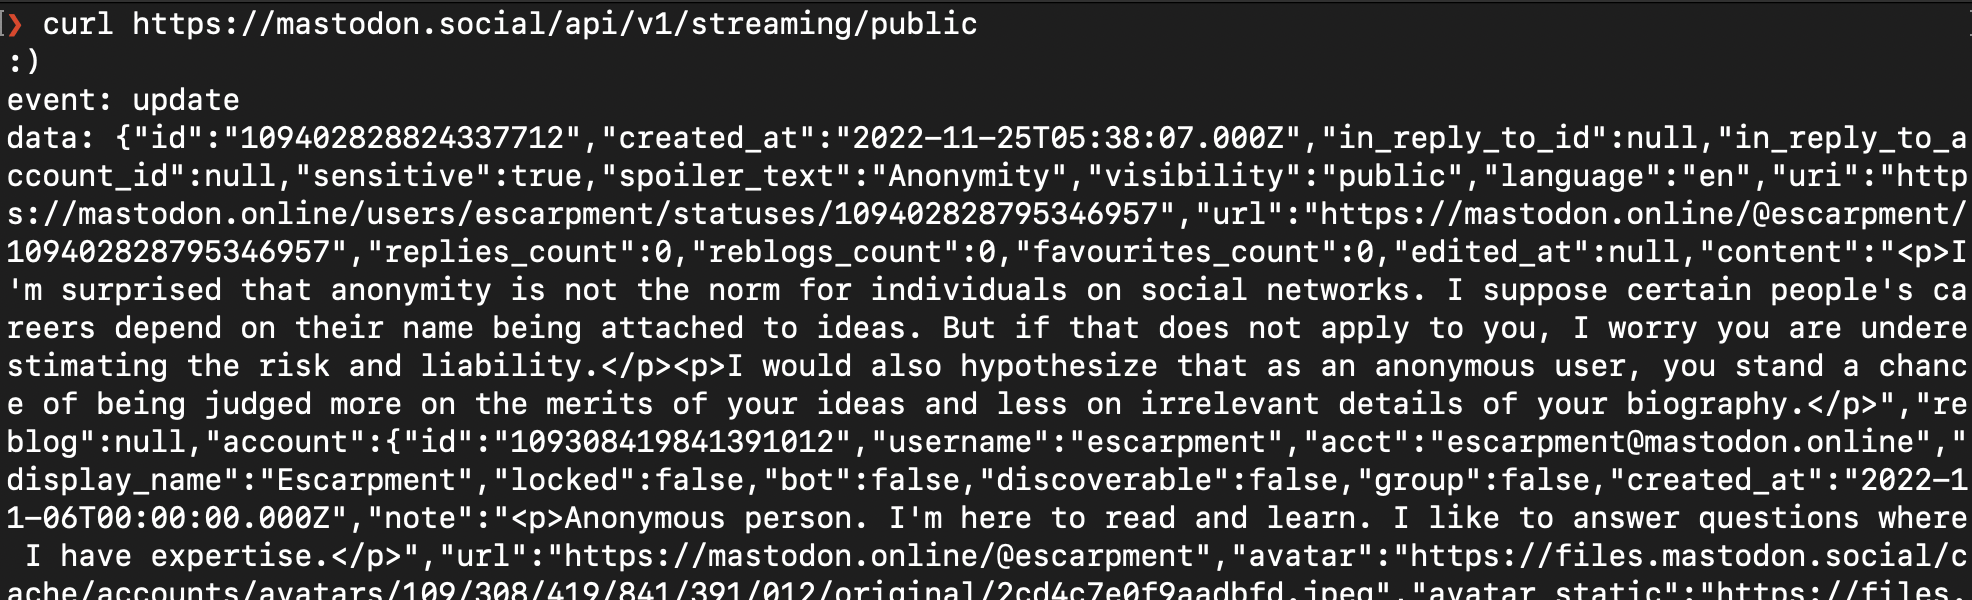
The Mastodon API has excellent documentation that makes it straightforward to access the public data feeds. You'll need to have an access token to read the data stream and you can generate it once you're registered. Actually, just give it a try right now. Register for a Mastodon account, get the token and run the line below in your terminal to start retrieving a stream of data from mastodon.social:
Loading code...
As a response you should see an endless flow of incoming events:
Parsing the response from the server manually is a monotonous and tedious operation. Rather than reinvent the wheel, you can use one of the available libraries for Mastodon. For this example we'll be using masto.js.
To give you an instant start to bring Mastodon data into an Apache Kafka cluster, clone this repository:
Loading code...
Once you have the contents of the repo locally, follow these steps:
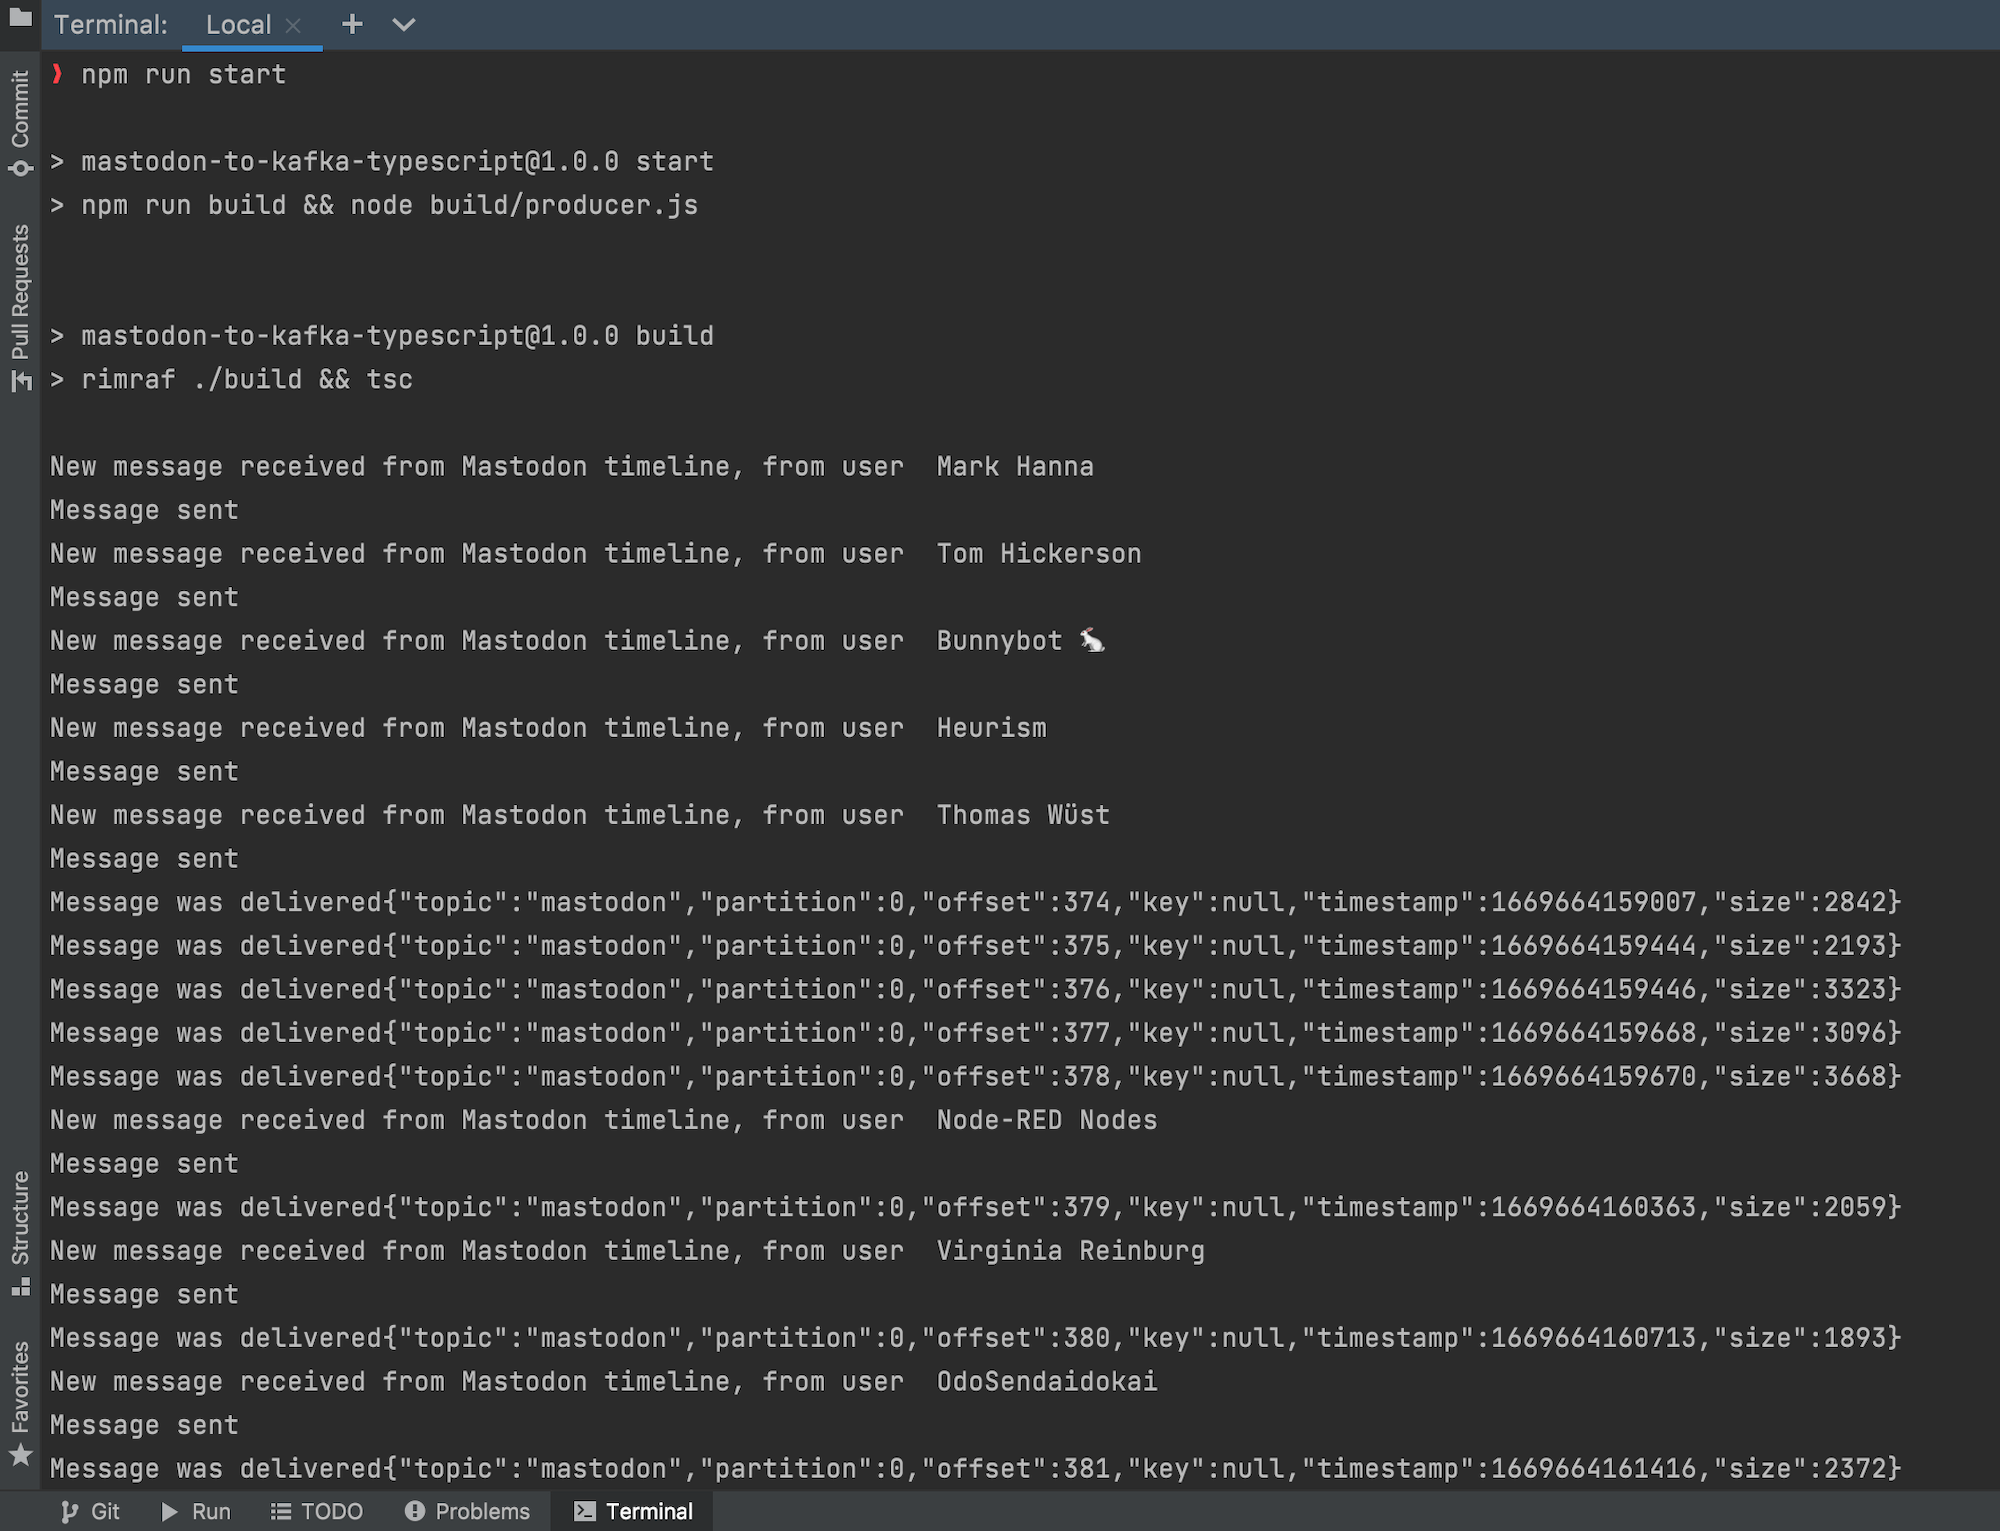
certificates/ and add the SSL certificates you downloaded earlier into this folder. We will need these to connect securely to Apache Kafka..env.example and rename to .env, this file will hold the environment variables.kafka.uri in .env to the address of your cluster. You can take it from the connection information of your Aiven for Apache Kafka service.mastodon.token in .env to your own token that you get from your Mastodon account.npm install to install all dependencies (if you don't have npm or NodeJS yet, follow the installation instructions).Finally, start by running npm run start and you should see a flow of delivery reports for every new message coming from the Mastodon public feed, that is defined in the code (in the next section you'll see how to change it to whichever Mastodon feed you like!).
If things don't work first time, check for error messages printed in the terminal. They will help you navigate the problem.
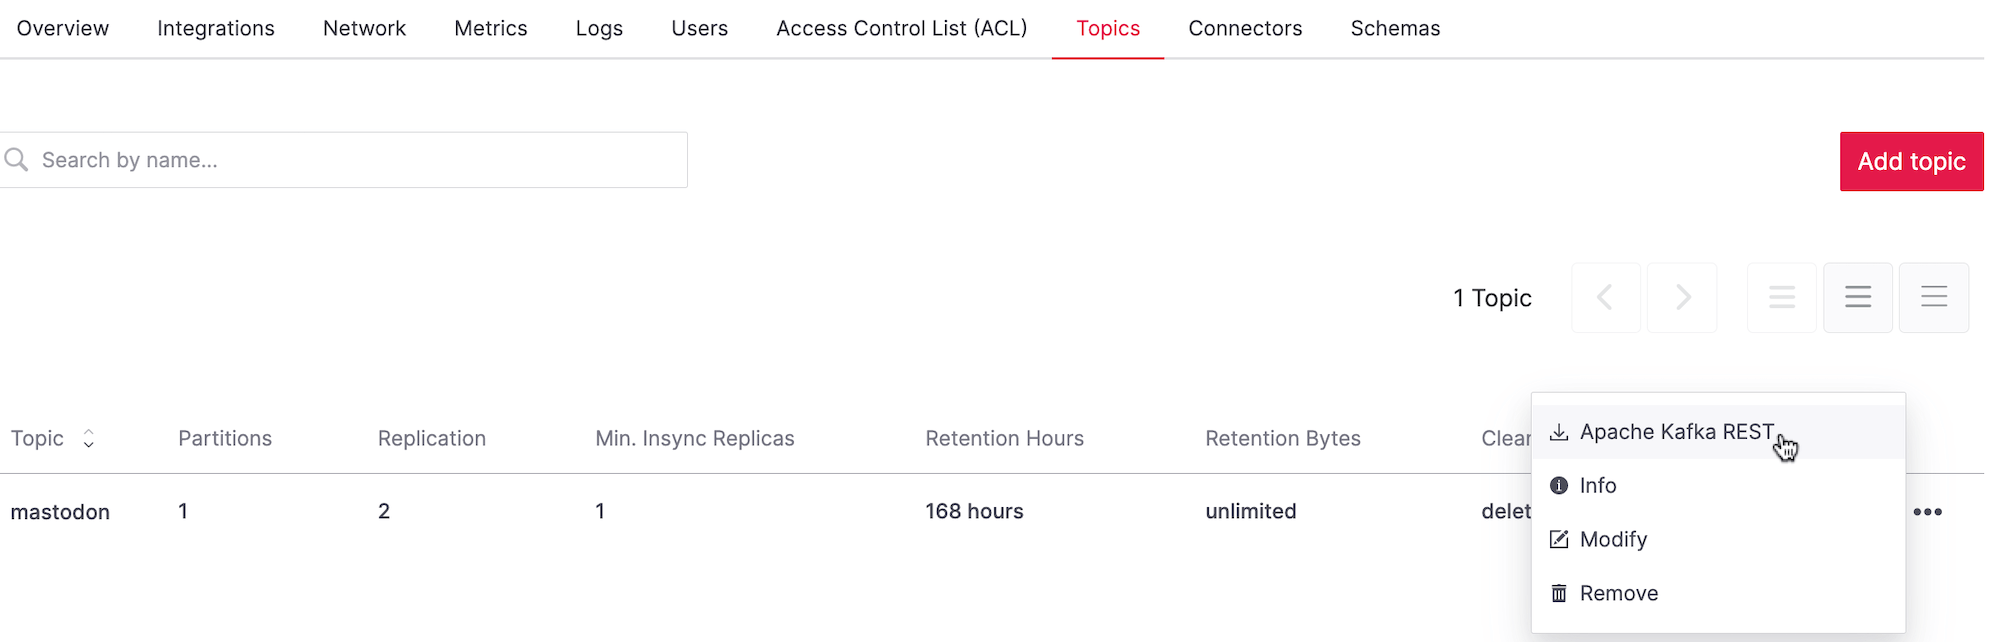
You can verify that the data is flowing and see what messages you get by enabling Apache Kafka Rest API.
In the contextual menu for the topic, select Apache Kafka REST:
We can step back to see exactly how the code works to send the data from Mastodon to Apache Kafka. This can be divided into two logical steps:
In the sections below you can see these steps in detail.
Open the file mastostream.ts. It contains a small module to stream the Mastodon data.
To initialise the Mastodon client you need to call login() from the masto.js client library and provide the required configuration. As URL, use your favourite Mastodon server. This is also the place to provide authentication information.
Loading code...
With the initialised Mastodon client you connect to the public stream API by calling the asynchronous function masto.stream.streamPublicTimeline().
Loading code...
Finally, you're ready to subscribe to the updates from the public stream provided by the API.
Loading code...
Now time to put these building blocks together.
For the sake of encapsulation, you wouldn't want the mastostream module to know directly about the Apache Kafka producer. That's why when putting all the above ingredients together we provide the module mastostream with a more generic callback argument.
This callback function will return the Mastodon status message converted to a string, and the party that triggered the mastostream will receive the data and be able to act on it:
Loading code...
This is what you need to stream the data from Mastadon! Time to send these messages to an Apache Kafka topic.
node-rdkafkaOpen producer.ts to see the code you need to send the data to an Apache Kafka topic. To work with Apache Kafka you can use one of the existing client libraries, there are several options available. This project uses node-rdkafka, which is a NodeJS wrapper for the Kafka C/C++ library. Check its GitHub repository Readme for installation steps.
With node-rdkafka you can create a producer to send data to the cluster. This is where you'll use the Apache Kafka configuration settings defined in .env earlier and the certificates that you downloaded to prepare to establish a secure connection.
Loading code...
The producer will emit events when things happen, so to understand what is happening and to catch any errors, we subscribe to numerous events including delivery reports.
Loading code...
One last event, which is especially important to use, is called on ready. This is the moment where the producer is ready to dispatch a message to the topic. This method will rely on the callback provided by the mastostream module that we implemented in the previous section:
Loading code...
Yet, none of the above will work till you run the connect() method. With the snippet below, run your code and watch the data start to flow!
Loading code...
This method has an optional second parameter, which is a callback that you can use to be informed about any errors during the connection.
We've now seen all the code and examined how it all works together. By separating the concerns of collecting data from Mastodon, and passing it to Apache Kafka, we have a system that can also be adapted to handle different data sources as needed.
With the data being constantly collected in the topic you can now use it as an input for other tools and databases, such as OpenSearch®, ClickHouse® and PostgreSQL®. Apache Kafka® Connect connectors will help you bring the data into other systems with no code required. Learn more about Apache Kafka and Kafka Connect and check the full list of sink connectors that are available in Aiven platform to see where you can bring the data for further storage and analysis.
curl https://streaming.mastodon.social/api/v1/streaming/public?access_token=your-tokengit clone https://github.com/aiven/mastodon-to-kafkaconst masto = await login({
url: 'https://mastodon.social/', // choose your favourite mastodon server
accessToken: process.env["mastodon.token"]
});const stream = await masto.stream.streamPublicTimeline();stream.on('update', (status) => {
console.log(status)
// next - send status data to Apache Kafka topic
});export default async (callback: (status: string) => void) => {
try {
const masto = await login({
url: 'https://mastodon.social/',
accessToken: process.env["mastodon.token"]
});
// Connect to the streaming api
const stream = await masto.stream.streamPublicTimeline();
// Subscribe to updates
stream.on('update', (status) => {
try {
callback(JSON.stringify(status));
} catch (err) {
console.log('Callback failed', err);
}
});
} catch (err) {
console.log(err)
}
};
//create a producer
const producer = new Kafka.Producer({
    'metadata.broker.list': process.env["kafka.uri"],
    'security.protocol': 'ssl',
    'ssl.key.location': process.env["ssl.key.location"],
    'ssl.certificate.location': process.env["ssl.certificate.location"],
    'ssl.ca.location': process.env["ssl.ca.location"],
    'dr_cb': true
});
producer.on('event.log', function (log) {
    console.log(log);
});

//logging all errors
producer.on('event.error', function (err) {
    console.error(err);
});

producer.on('connection.failure', function (err) {
    console.error(err);
});

producer.on('delivery-report', function (err, report) {
    console.log('Message was delivered' + JSON.stringify(report));
});

producer.on('disconnected', function (arg) {
    console.log('producer disconnected. ' + JSON.stringify(arg));
});producer.on('ready', async () => {
mastostream((status) => {
producer.produce(
'mastodon', // topic to send the message to
null, // partition, null for librdkafka default partitioner
Buffer.from(status), // value
null, // optional key
Date.now() // optional timestamp
);
producer.flush(2000);
}).catch((error) => {
throw error;
});
});producer.connect({}, (err) => {
if (err) {
console.error(err);
}
});